Redesign Señor Developer in 10 Minutes with 4 Prompts
I came back from a year off blogging and decided the site needed a facelift. I’m not a UX designer, I don’t write Ruby, and I wasn’t about to spend a weekend wrestling with CSS from scratch — so I handed the whole thing to the agents.
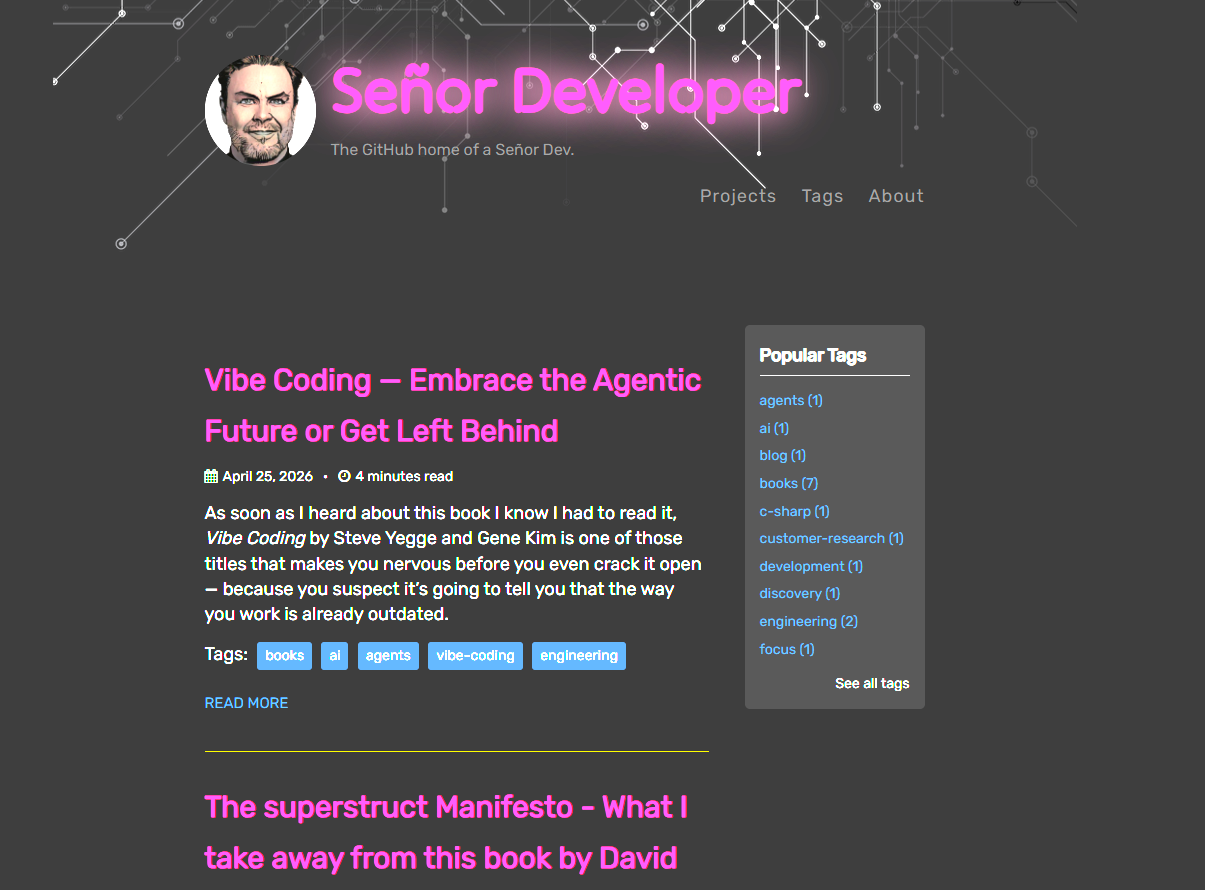
Here’s how I went from this:
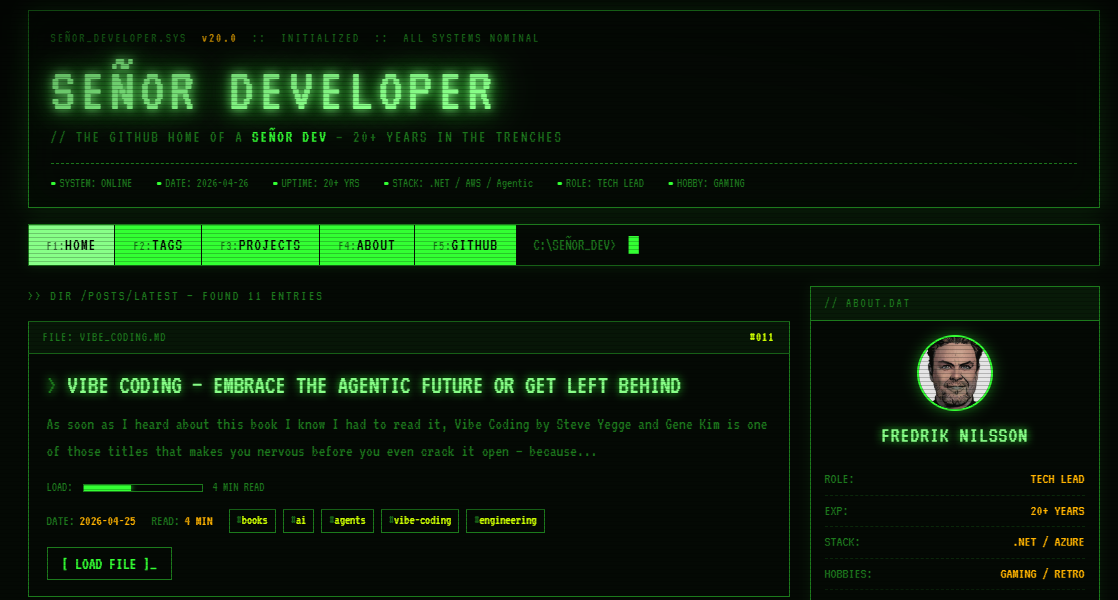
To this:
In about 10 minutes, with 4 prompts.
Step 1 — Generate Prototypes with Claude Code

I opened Claude Code in the site folder and asked it to generate two prototype designs. I gave it a bit of context about myself — years in IT, the kind of content I write, the vibe I was going for — and let it do its thing.
A few minutes later I had two fully self-contained prototype.html files to choose from. Both were genuinely good. Picking one was the hardest part of the whole process.

The prompt was roughly: “Create 2 different prototype designs for my developer blog. I’m a senior software engineer with 20+ years of experience. The tone should feel technical but approachable. Generate each as a single self-contained HTML file.”
Step 2 — Implement with GitHub Copilot

Once I had a prototype I liked, I switched to GitHub Copilot (why not) in VS Code and asked for a plan to implement it across my Jekyll site — using the prototype file as context.
I grabbed a coffee. When I came back, the layout, styles, and templates had all been updated to match the prototype. Copilot had worked out the component structure, updated _layouts, _includes, and style.scss without me touching a line by hand.
The prompt was roughly: “Here is a prototype.html file with a design I want to apply to my Jekyll blog. Create a step-by-step implementation plan, then carry it out — updating layouts, includes, and styles to match.”
Step 3 — Run It Without Installing Ruby
I don’t have Ruby on my machine and I didn’t particularly want to install it. Enter dev containers.
VS Code’s dev container support lets you run your entire development environment inside Docker, with zero bloat on your host machine. Setup was two steps:
- Add a
.devcontainer/devcontainer.jsonpointing at a Jekyll image - Close VS Code, reopen the folder — it automatically connects to the container
{
  "name": "Jekyll Blog",
  "image": "mcr.microsoft.com/devcontainers/jekyll:latest",
  "forwardPorts": [4000],
  "postCreateCommand": "bundle install"
}
Then bundle exec jekyll serve and the redesigned site was running locally. No Ruby installation required.
Step 4 — Tweaks and Bug Fixes
Running it locally revealed a couple of rendering issues — nothing dramatic, but enough to matter. One Copilot prompt fixed the layout quirks.
The more interesting bug: pagination was returning 404s. The numbered page links were generating /page2/ instead of /page/2/ — one missing slash, completely invisible unless you know where to look. That kind of thing could easily eat an hour of frustrated debugging. Copilot spotted and fixed it in seconds.
Conclusion
The whole redesign — prototype, implementation, tooling, bug fixes — took roughly 10 minutes of my actual time. The agents did the rest.
I’m not saying skill doesn’t matter. Knowing what to ask for, recognising a good output from a bad one, and owning the result when something goes wrong — that’s still entirely on you. As I wrote in my Vibe Coding post, you’re the head chef. But right now the sous chefs are exceptionally good.
So here’s the challenge: what’s the thing you’ve been putting off because you “don’t know enough” to do it? Because that excuse is running out of road fast.
Tags: ai, claude-code,github-copilot, dev-containers, jekyll, tips-and-tricks